Dock your PiHole

[Update 2025-07-13: Web browsers have been using DOH: DNS Over Https for some time now. I have found that while you can disable this setting in Firefox, you might be surprised to see it switched back when Firefox updates! You also have to remember to set it for each user profile. This makes pihole less useful. I recommend the adblocker uBlock Origin, and pfSense or OpnSense. Maybe try getting off of the internet. ]
Pihole is a network device that blocks websites. Technically, it is a linux computer that runs a DNS server and that somehow lets it block websites. There are many technical details, but really nobody cares, so...
You can use a pihole to block ads or websites of your choice such as "twitter" or "x" or "pinterest", for example. The DNS lookup for blocked sites (technically blocked domain names) won't return a valid IP address for the site and thus no internet bandwidth will be wasted on garbage websites or ads, at least, that's the idea. This blocking works for all devices on your local network, so that you can finally have some blocking for your iPad!
(Ok about that iPad: to block ads for your whole network, you will have to change your router's DNS settings to the pihole IP address. In this document, I only show how to set it up for a single computer. Refer to your router's instruction manual to figure out how to set the network DNS).
Blocklists are available online for blocking ads, malware, gambling, and websites that start with the letter "x". Webinks change, so I am not including them here. You will just have to search.
Ok, so I have had a pihole device emulated as a virtual machine for a few years already, but since then, pihole developers have introduced a new version "6.0" that breaks backward compatibility, so I had to do a bit of work to upgrade. So I upgraded the VM and then I thought, why not try the docker version? It should use fewer system resources.
I should explain why I am emulating pihole. Pihole is intended to be run on a little computer called a Raspberry Pi. Some number of years ago there was a "chip shortage" and there were none of these little computers available for sale, so I said "Why don't I use my supercomputer to emulate it". It seems to work ok that way, so I have been doing that ever since.
Docker is really easy to set up. However, its configuration files are in a format call YAML which requires specific numbers of tabs or spaces for indentation. The indentation must all match, so pay attention!
There is a slight added difficulty in setting up docker pihole on Ubuntu systems. It is that systemd is using port 53 (the DNS port) already. I usually choose to NOT modify systemd settings. So I solved this problem by setting up a macvlan device for pihole to use. I also solve the other problem of the pihole web interface being unavailable from the host computer, which is a result of using the macvlan.
There is a lot of code coming up, so you might want to turn your phone sideways.
The script "pihole-docker-macvlan.sh":
#!/bin/bash

# This script sets up pi-hole macvlan network devices
# and enables web config access on the host computer.

# Instructions:
# run this script, then run:
#   sudo docker compose -f pihole-docker.yml up -d

# After running the scripts:
# The easiest way to deal with selecting
# and using pi-hole on the gnome desktop:
	# Manually set up a network manager connection using pihole dns
	# at 192.168.0.222, I named mine: "pihole-docker".
# I have other network manager connections such as "pihole-vbox",
# and "Profile 1", these can be easily selected by users who don't
# have root permissions.

# The network manager connection will persist between reboots, but
# this script and the pihole docker app will need to be rerun on
# every reboot. There are ways to make it persist, but I haven't
# done so because I don't reboot my workstation computer very often.

# The macvlan devices are used because in Ubuntu, systemd-resolved
# listens on port 53 even if you are not serving DNS. If you use
# the default docker bridge network, you will find that the port is
# already in use. While this is solvable, I don't think
# that it is worthwhile to solve after learning about what is
# involved.

# I will use a /30 network because I only need 2 usable ip adresses.
	# 192.168.0.220/30 network address
	# 192.168.0.221/30 pihole admin: https://192.168.0.222/admin
	# 192.168.0.222/30 pihole dns
	# 192.168.0.223/30 broadcast

# You can't access 192.168.0.222 from the host machine because
# it is on the docker network. This is just how docker works.
# The workaround is the piholeadmin network that gets around
# this restriction.

# My network device is "enp0s31f6", yours might be "eth0".

# If you need a random mac address for use in pihole-docker.yml:
	#```bash
	# printf '02:%02x:%02x:%02x:%02x:%02x\n' \
	# 	$((RANDOM%256)) \
	# 	$((RANDOM%256)) \
	# 	$((RANDOM%256)) \
	# 	$((RANDOM%256)) \
	# 	$((RANDOM%256)) \
	# 	; #generate random mac address

# pihole macvlan
sudo docker network create -d macvlan \
	--subnet=192.168.0.0/24 \
	--gateway=192.168.0.1 \
	--ip-range=192.168.0.220/30 \
	--aux-address="piholeadmin=192.168.0.221" \
	-o parent=enp0s31f6 pihole \
	;

# piholeadmin macvlan
sudo ip link set enp0s31f6 promisc on
sudo ip link add piholeadmin link enp0s31f6 type macvlan mode bridge
sudo ip addr add 192.168.0.221/30 dev piholeadmin
sudo ip link set piholeadmin up

# if you need to undo the effects of this script:
#   sudo docker compose -f pihole-docker.yml down
#   sudo docker network rm pihole
#   sudo ip addr del 192.168.0.221/30 dev piholeadmin
#   sudo ip link delete piholeadmin
#   sudo ip link set enp0s31f6 promisc off
The docker configuration file "pihole-docker.yml", remember to set your desired password:
# More info at https://github.com/pi-hole/docker-pi-hole/
# and https://docs.pi-hole.net/
services:
  pihole:
    container_name: pihole
    # You can check for different versions at:
    #   https://hub.docker.com/r/pihole/pihole/tags
    # To download one, do something like this:
    #   sudo docker pull pihole/pihole:2025.03.0
    # Now you can use that particular version:
    # image: pihole/pihole::2025.03.0
    # or use the latest version:
    image: pihole/pihole:latest
    # Docker images are cached once downloaded or used.
    # To get a list of cached images:
    #   sudo docker images
    # To remove use the docker rmi command, specify by tag
    #   sudo docker rmi pihole/pihole:latest
    # or specify the image id:
    #   sudo docker rmi 4406c6631a10
    ports:
      # DNS Ports
      - "53:53/tcp"
      - "53:53/udp"
      # Default HTTP Port
      - "80:80/tcp"
      # Default HTTPs Port. FTL will generate a self-signed certificate
      - "443:443/tcp"
      # Uncomment the below if using Pi-hole as your DHCP Server
      #- "67:67/udp"
      # Uncomment the line below if you are using Pi-hole as your NTP server
      #- "123:123/udp"
    dns:
      - 127.0.0.1 # use local DNS, since the pihole
      - 1.1.1.1 # optional fallback DNS
    networks:
      pihole:
        ipv4_address: 192.168.0.222
    environment:
      # Set the appropriate timezone for your location from
      # https://en.wikipedia.org/wiki/List_of_tz_database_time_zones, e.g:
      TZ: 'America/Detroit'
      # Set a password to access the web interface.
      # Not setting one will result in a random password being assigned
      FTLCONF_webserver_api_password: 'correct horse battery staple'
      # If using Docker's default `bridge` network setting the
      # dns listening mode should be set to 'all'
      # FTLCONF_dns_listeningMode: 'all'
      ServerIP: 192.168.0.222
      mac_address: 02:fa:5e:da:71:3b
    # Volumes store your data between container upgrades
    volumes:
      # For persisting Pi-hole's databases and common configuration file
      - './etc-pihole:/etc/pihole'
      # Uncomment the below if you have custom dnsmasq config files
      # that you want to persist. Not needed for most starting fresh
      # with Pi-hole v6. If you're upgrading from v5 you and have used
      # this directory before, you should keep it enabled for the first
      # v6 container start to allow for a complete migration. It can be
      # removed afterwards.
      # Needs environment variable FTLCONF_misc_etc_dnsmasq_d: 'true'
      #- './etc-dnsmasq.d:/etc/dnsmasq.d'
    cap_add:
      # See https://github.com/pi-hole/docker-pi-hole#note-on-capabilities
      # Required if you are using Pi-hole as your DHCP server, else not needed
      # - NET_ADMIN
      # Required if you are using Pi-hole as your NTP client
      # to be able to set the host's system time
      #- SYS_TIME
      # Optional, if Pi-hole should get some more processing time
      - SYS_NICE
    restart: unless-stopped
networks:
  pihole:
    external: true
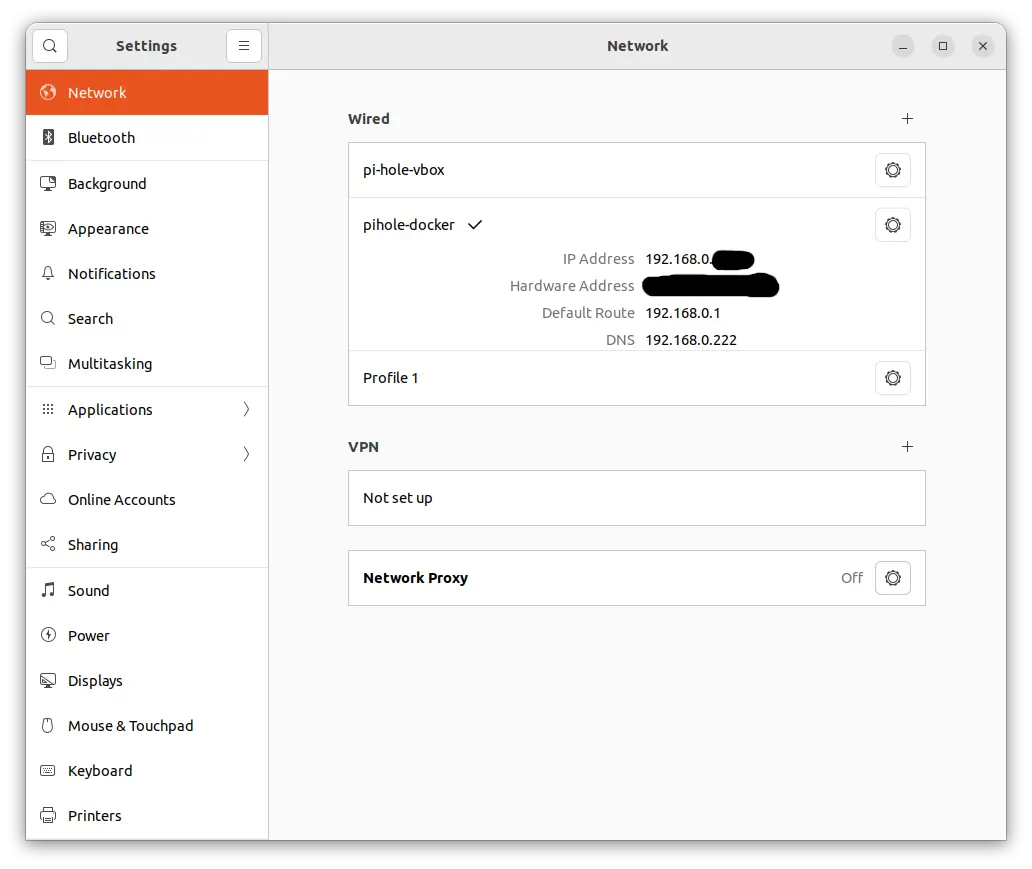
Once, you have to docker pihole up and running, make a new network manager connection, and set the DNS to the IP address of the pihole:

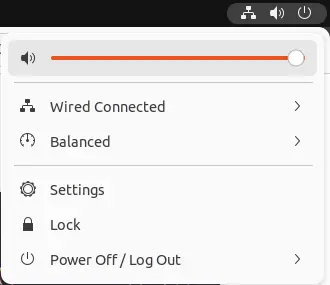
Then you can clicky-click on the upper right of the screen to select your new connection:

Just so you know, pihole is intended to be easy to use (it is), but If you need more advanced web filtering, I suggest pfSense or OPNsense. Those are firewall systems that offer all the IP address filtering and other advanced features that you crave. Those can be emulated too.
So, um, yeah, I did this and it changed my life.

