Linux virtual machines using QEMU

A virtual machine (vm) is a computer within your computer. Running a vm can make some system administration tasks very easy. Backups are easy, just copy the disk image file to your backup drive. You can take snapshots, which are like savepoints that you can revert the vm back to. Suppose you want to try some new software, but what if it doesn't work? What if it messes up your computer? Well, this becomes easy with a vm. You can shutdown the vm, take a snapshot. Run the vm, try the new software and if you don't like it, you can shutdown the vm and revert back to the snapshot as if nothing happened.
I am using ubuntu 22.04 as my host system. I needed to install qemu and virt-viewer and maybe some other stuff that I don't remember, but this blog post is not really about that part.
First, know that there is a workaround needed for virt-viewer version 7 on ubuntu 22.04:
# For Error:
# qemu-system-x86_64: You need a capable Spice client,
# such as virt-viewer 8.0
# Workaround for virt-viewer 7:
# Add or update this section in ~/.config/mimeapps.list:
[Added Associations]
x-scheme-handler/spice+unix=remote-viewer.desktop;
I use this script to create the vm(s):
#!/bin/bash
# setup.sh
# Create a qemu vm.

CDROM="/iso/slackware/slackware15/slackware64-15.0-install-dvd.iso"
# CDROM="/iso/ubuntu/ubuntu-22.04.3-desktop-amd64.iso"
# CDROM="/iso/ubuntu/ubuntu-24.04.2-desktop-amd64.iso"

echo "To get your mouse and keyboard back from the vm, press ctrl-alt-g"
qemu-img create -f qcow2 "${1:-diskimage}.qcow2" 32G \
&& qemu-system-x86_64 \
-enable-kvm \
-cpu host \
-m 16G \
-smp cores=2,threads=2,sockets=1 \
-device AC97 \
-device virtio-net-pci,netdev=net0 \
-netdev user,id=net0,net=192.168.0.0/24,dhcpstart=192.168.0.9 \
-hda diskimage.qcow2 \
-cdrom "${CDROM}" \
-boot d \
-vga qxl \
;
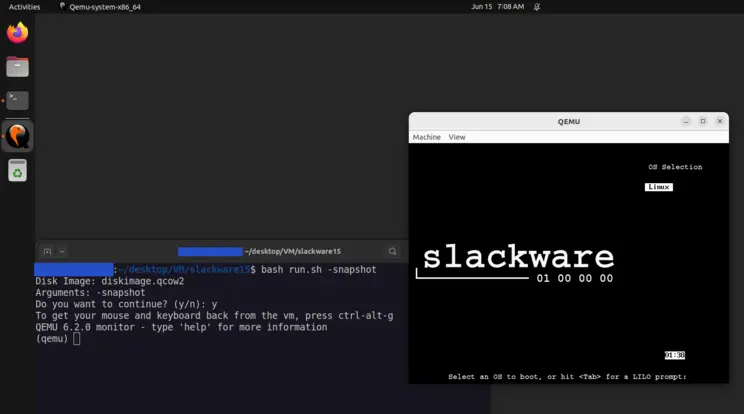
I use this next script to run a vm. It is a bit more complicated than the setup script because it will be used more often. This script runs the vm with audio, internet access, and a shared directory. The variables that you might want to change are all conveniently near the beginning of the file. Each vm should have its own copy of this script.
#!/bin/bash
# run.sh
# Run a qemu vm.

# Notes:
# I have chosen the 192.168.10.0/24 network for my vm(s).

# VARIABLES:
DISKIMG="diskimage.qcow2"
CDROM="/iso/slackware/slackware15/slackware64-15.0-install-dvd.iso"
# NAME (descriptive name for the VM)
# NUM (two-digit identifier)
# NUM should be unique amongst vm(s) because it specifies the
#  last octet of the vm(s) ip address, and also more things
#  if using SPICE.
# The NAME variable is only used if using SPICE.
NAME=slackware
NUM=10
# END VARIABLES


USAGE=" Usage: run.sh [-i DISKIMG|--img=DISKIMG] [OPTS] [ARGS]

 Run a qemu vm.

 Options:
   -h,--help                  Print this message.
   -i DISKIMG,--img=DISKIMG   Defaults to '${DISKIMG}'
                              if option is not specified.

 Any other options/args will be passed to qemu.
 "


# Function to prompt for user confirmation
confirm() {
    read -r -p "Do you want to continue? (y/n): " response
    case "$response" in
        [yY][eE][sS]|[yY])
            return 0
            ;;
        *)
            echo "Operation cancelled."
            exit 1
            ;;
    esac
 }

# Check for help options
for arg in "$@"; do
    case $arg in
        -h|--help)
            echo "$USAGE"
            exit 0
            ;;
     esac
 done

# Process additional options. The -i/--img option detection is
# very permissive. It accepts all of these forms:
# -i DISKIMG, --img DISKIMG
# -i=DISKIMG, --img=DISKIMG
# -i:DISKIMG, --img:DISKIMG
# Any other options/args will be passed to qemu.
# For example, the "-snapshot" option will be passed through.
filtered_args=() # options/args to be passed to qemu.
SKIP=false
for arg in "$@"; do
    if  [[ "$arg" == --img=* \
        || "$arg" == --img:* \
        || "$arg" == --img   \
        || "$arg" == -i=*    \
        || "$arg" == -i:*    \
        || "$arg" == -i     ]]; then
        if [[ "$arg" == --img=*    ]]; then
            DISKIMG="${arg#--img=}"
         elif [[ "$arg" == --img:* ]]; then
            DISKIMG="${arg#--img:}"
         elif [[ "$arg" == --img   ]]; then
            DISKIMG="$2"
            SKIP=true
         elif [[ "$arg" == -i=* ]]; then
            DISKIMG="${arg#-i=}"
         elif [[ "$arg" == -i:* ]]; then
            DISKIMG="${arg#-i:}"
         elif [[ "$arg" == -i   ]]; then
            DISKIMG="$2"
            SKIP=true
         fi
     else
        if [[ "$SKIP" != true ]]; then
            filtered_args+=("$arg")
         fi
        # Reset SKIP for the next iteration
        SKIP=false
     fi
 done

# Check variables and prompt user before proceeding.
# Output the extracted image and the filtered arguments
echo "Disk image: $DISKIMG"
# shellcheck disable=SC2145
echo "Additional args: ${filtered_args[@]}"

if [[ ! -f "$DISKIMG" ]]; then
    echo "Error: Disk image '$DISKIMG' not found."
    exit 1
 fi

if [[ -z "$NAME" ]]; then
    echo "Error: NAME must not be empty."
    exit 1
 fi

if ! [[ "$NUM" =~ ^[0-9]{2}$ ]]; then # must be 2 digits
    echo "Error: NUM must be a two-digit number (00-99)."
    exit 1
 fi

# Prompt for confirmation before proceeding.
confirm;

# Run qemu:
# With AC97 audio.
# With "user" networking. The simplest type. Basically NAT.
# With a shared directory /vm/share (host) --> /mnt/share (vm),
#   configured for the vm in setup-guest.sh .
# The qxl graphics dipslay is scalable/resizeable.
# To boot from cdrom, change: "-boot c" to "-boot d"
echo "To get your mouse and keyboard back from the vm, press ctrl-alt-g"
qemu-system-x86_64 \
-enable-kvm \
-cpu host \
-m 16G \
-smp cores=2,threads=2,sockets=1 \
-device AC97 \
-device virtio-net-pci,netdev=net0 \
-netdev user,id=net0,net=192.168.10.0/24,dhcpstart=192.168.10.${NUM} \
-hda "$DISKIMG" \
-cdrom "${CDROM}" \
-boot c \
-vga qxl \
-monitor stdio \
-virtfs local,path=/vm/share/,mount_tag=host0,security_model=mapped,id=host0 \
"${filtered_args[@]}" \
;

# The previous version used the SPICE viewer.
# It says "Remote Viewer" in the title bar of the app. Ha!
# SPICE is a protocol for just that. As I am running the vm(s)
# on my local computer, I don't need SPICE, so...
# I leave this here for reference.

# SPICE does work locally though.

# SPICE viewer, Remote Viewer, spice-app, or whatever you call
# it doesn't seem to allow for a scalable display window,
# which is less convenient than the technique used above.

# Maybe allow an option: --spice to activate this mode?

## spicechannel${NUM}
## ${NAME}.home.arpa.${NUM}
## ip: 192.168.10.${NUM}
## spice port 59${NUM}

# echo "To get your mouse and keyboard back from the vm,"
# echo "press left-ctrl+left-alt"
# qemu-system-x86_64 \
# -m 16G \
# -cpu host \
# -smp cores=2,threads=2,sockets=1 \
# -device AC97 \
# -device virtio-serial-pci \
# -device \
#  virtserialport,chardev=spicechannel${NUM},name=${NAME}.home.arpa.${NUM} \
# -chardev spicevmc,id=spicechannel${NUM},name=vdagent \
# -device virtio-net-pci,netdev=net0 \
# -netdev user,id=net0,net=192.168.10.0/24,dhcpstart=192.168.10.${NUM} \
# -enable-kvm \
# -hda "$DISKIMG" \
# -monitor stdio \
# -spice port=59${NUM},disable-ticketing=on \
# -display spice-app \
# -vga qxl \
# -virtfs \
#  local,path=/vm/share/,mount_tag=host0,security_model=mapped,id=host0 \
# "${filtered_args[@]}" \
# ;
This script will set up the shared directory for the guest os (the vm):
#!/bin/bash
# setup-guest.sh
# Set up a shared folder in a linux guest qemu vm.
# Run this file as root in the vm:
# Ex: sudo bash setup-guest.sh

# Run setup.sh first. Install the operating system,
# then shutdown the vm.
#
# Run run.sh to start the vm.
# In the vm:
#	sudo mkdir /mnt/share
#	sudo mount -t 9p -o trans=virtio,version=9p2000.L host0 /mnt/share

# Then you can use the share folder to run the file "setup-guest.sh"
# in the vm. Set up the vm as you like. When you have done so,
# shutdown and take a snapshot.

# Note: on slackware 15, /etc/initramfs-tools and update-initramfs
# do not exist. Slackware 15 has 9p already enabled if you install
# everything.

# Initialize the distribution flags
SLACKWARE=true
UBUNTU=false

# Function to toggle the distribution variable
toggle_distro() {
    case "$1" in
        slackware)
            SLACKWARE=true
            UBUNTU=false
            ;;
        ubuntu)
            SLACKWARE=false
            UBUNTU=true
            ;;
        *)
            echo "Invalid distribution specified."
            ;;
     esac
 }

# Check the OS type:
# /etc/os-release defines some variables.
# The $ID variable will be either "slackware" or "ubuntu"
# on either of those sytems.
if [[ -f /etc/os-release ]]; then
    # shellcheck disable=SC1091
    source /etc/os-release
    if [[ "$ID" == "slackware" ]]; then
        echo "Running on Slackware"
        toggle_distro slackware
     elif [[ "$ID" == "ubuntu" ]]; then
        echo "Running on Ubuntu"
        toggle_distro ubuntu
     else
        echo "Running on another distribution: $ID"
     fi
 else
    echo "Unable to determine the distribution."
    echo "Read the file setup-guest.sh yourself and figure it out."
    exit 1
 fi

if [[ "$SLACKWARE" == true ]]; then
mkdir /mnt/share
echo "host0 /mnt/share 9p trans=virtio,version=9p2000.L 0 0" >> /etc/fstab
fi

if [[ "$UBUNTU" == true ]]; then
mkdir /mnt/share
echo "9p
9pnet
9pnet_virtio
" >> /etc/initramfs-tools/modules
update-initramfs -u
echo "host0 /mnt/share 9p trans=virtio,version=9p2000.L 0 0" >> /etc/fstab
fi
Once you have your vm set up how you like, shut the vm down and take a snapshot:
qemu-img create -f qcow2 -b diskimage.qcow2 -F qcow2 snapshot.img
You can then edit the DISKIMG variable in run.sh so that the snapshot is the default disk image. Make diskimage.qcow2 read only so that you always have a base image and never have to wait for the guest os to install ever again. Easy.
There is quite a bit more to the whole snapshot thing, but I won't cover that here. Just know that the snapshotting command that I just showed you makes an external snapshot (which produces a new file). Know that you can also take internal snapshots of a qcow2 file using qemu-img snapshot . Read the docs.
So, yeah, I did this and it changed my life.